As part of my PgCert in HCID, I completed an Interaction Design module. Here I demonstrate my ability to apply the interaction design process to design an app.
Process
This section outlines the step-by-step process that was taken to design an interactive technology using the interaction-design process
Step 1:
Requirements
Successful completion of this project required me to:
- Demonstrate an understanding of the importance of usability
- Apply an iterative user-centred interaction design process
- Design & conduct user research using a range of data collection techniques
- Develop conceptual and detailed designs for interactive technologies
- Evaluate prototype designs
- Interpret & apply HCI principles and guidelines
The task required me to adopt a user-centred interaction design process to design an interactive technology that would help a community to feel connected during the pandemic.
I decided to create an application for a small community of local freelance writers. Prior to COVID, they would meet at the community workspace, host member-led events and network, however, the pandemic has forced them to adapt the way these activities are conducted.
Step 2:
User Research
How I conducted my user research: Firstly, I set a research goal, which was to gain an understanding of the community, the activities they participate in and opportunities for a new digital technology to improve their connectedness.
Secondly, I outlined my research method. I opted for methodological triangulation, whereby I combined outsider observations and semi-structured interviews to gather data. I justified this method because it would help me to see if what members say they do is congruent with what they actually do. This helped me to identify challenges and opportunities. Furthermore, observations helped me to understand the context of the community activities, whilst semi-structured interviews allowed me to probe deeper when appropriate, which eliminated the need to use questionnaires.
Analysis of User Research
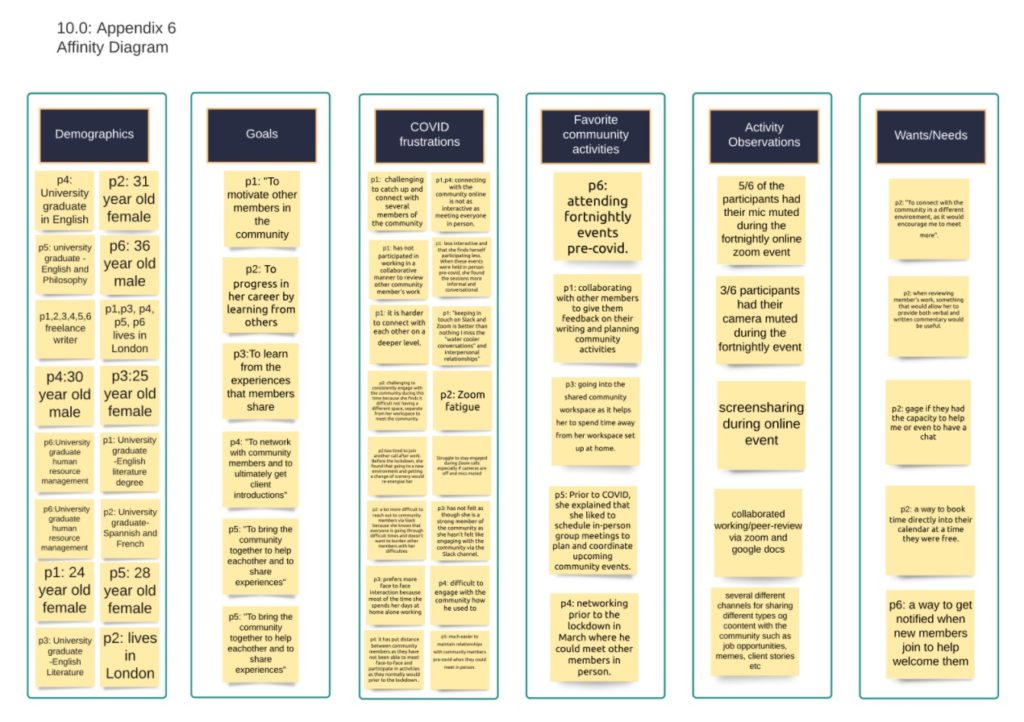
Affinity diagram:
Courage and Baxter (2005) state that affinity diagrams are one of the most useful methods for analysing qualitative data. Thus I created an affinity diagram using my interview and observational data. This helped me to code my research findings, and identify six categories. The results of my affinity diagram helped me to identify two distinct users from my user research, who had differing goals, and frustrations. Therefore, it made me realise that I would need to consider this in the design process going forwards.
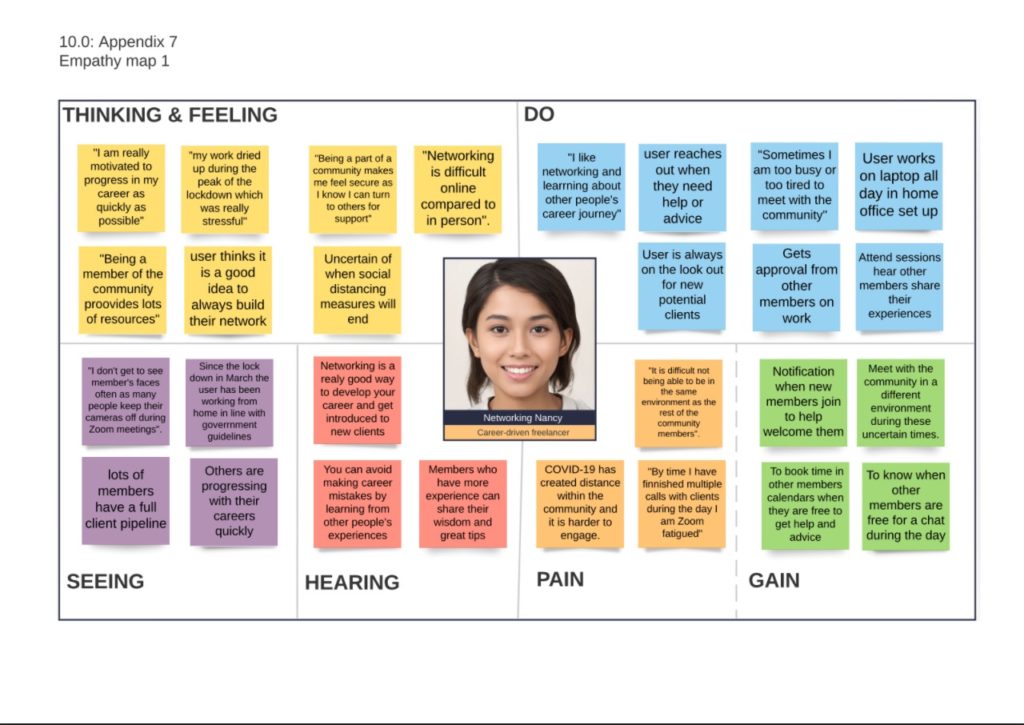
Empathy map:
I used the results and findings of my affinity diagram to create two aggregated empathy maps. I did this exercise because it helped me to further capture the two distinct users, and tease out their thoughts, feelings, actions and what they see. I was able to build the foundation of the personas and empathise with their unique frustrations. The maps reveal that the level of connectedness has declined which is a pain point.
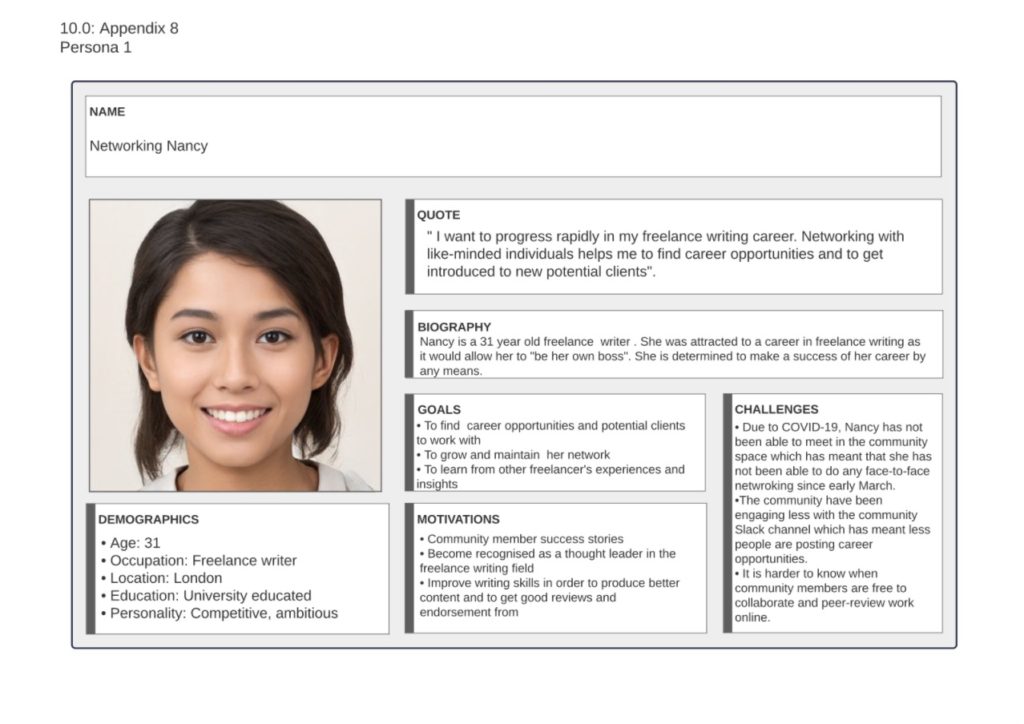
Persona Map:
I used my analysis to represent both personas. The first persona is motivated by what they can gain from the community in terms of networking opportunities, which leads to them achieving their goals of gaining new clients. The second persona is motivated by what they can give to the community and is, therefore, motivated to bring the community together, help each other and share resources.
Both personas are frustrated by the challenges that have arisen from COVID-19 as it hinders their ability to meet their needs via the community. The results of my analysis allowed me to define the design requirements. I adapted and combined the requirements frameworks outlined in Rogers, Sharp, and Preece (2007) with the Volere (2020) technique to categorise each requirement and assign a rationale. If the requirements are met, community connectedness will be enhanced.
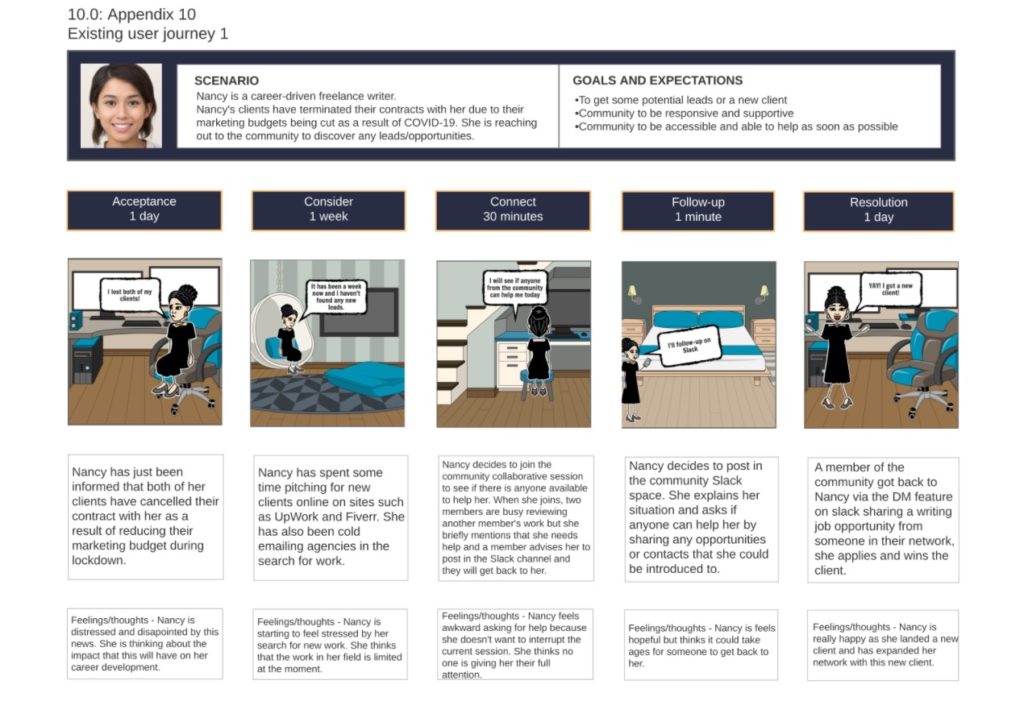
Existing user journey:
I created two user journeys each representing one of the two personas.
The results from the persona exercise and empathy maps informed my decision to create two user journeys because although the scenario is the same, the behaviours and motivations of the personas are different. The user journey helped me to visualise the constraints users face during the pandemic.
Step 3:
Problem Statement
The Point of View statement helped me to ideate in a goal-oriented manner. The purpose of the POV statement is to define the right challenge to solve. It involves reframing a design challenge into an actionable problem statement.
The “How Might We…” question helps designers to reframe the POV statement to start generating design solution ideas.

Point of view: persona 1 needs a digital technology that facilitates the progression of their career via pursuing community activities such as networking and learning from other members. Persona 2 needs a digital technology that helps them to pursue activities that enables them to bring members together to help each other.
Problem statement: My user research helped me to define and frame the design challenge. “How might we design a digital technology that helps to enhance community connectedness by facilitating the pursuit of activities that enable users to share content that aids career progression remotely, during the pandemic.”
Step 4:
Conceptual Designs
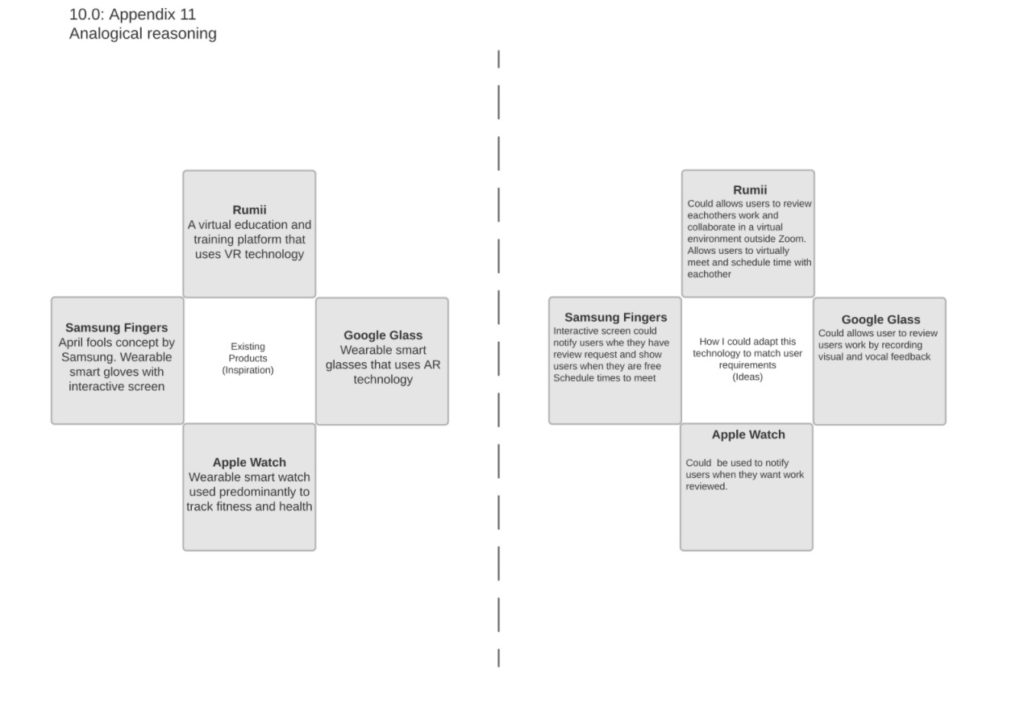
I used analogical reasoning as my ideation method, which helped me to come up with different ideas to solve the design problem identified in the user research phase, by assessing alternative design solutions. I achieved incremental innovation by tailoring existing concepts to user needs. To do this, I adapted the Board of Innovation’s (2020) tool.
I wrote out my ‘how might we’ statement to keep this top of mind. On the left, I outlined existing solutions and on the right noted how I could adapt the solution to my users, I identified and explored four alternative design solutions, smart gloves, smart glasses, VR and a smartwatch.
These ideas were justified with the user research which implies that users would benefit from a portable technology that they can wear during the day in order to easily connect, share availability and pursue activities. Below, I outline how I considered trade-offs, constraints and priorities in order to select an idea to conduct user testing on.
Critique of alternative designs: I then needed to make trade-offs in order to align with my problem statement and prioritise the user requirements formed from the user research analysis.
Although each of the four ideas could have features that met the user’s needs, as evidenced in the future user journeys, I decided to take the VR concept into the next phase and user test it. Based on the highest prioritisation being placed on requirement 3, and the fact that social distancing is impacting the community’s connectedness, it seems compelling to suggest that VR would enable this requirement to be met to a greater extent than the wearable smartwatch, glasses or gloves.
However, the trade-off is that VR could make requirement 4 more complicated than necessary, but this design decision is justified by the fact that this feature has a lower priority.
Low-Fidelity Wireframes
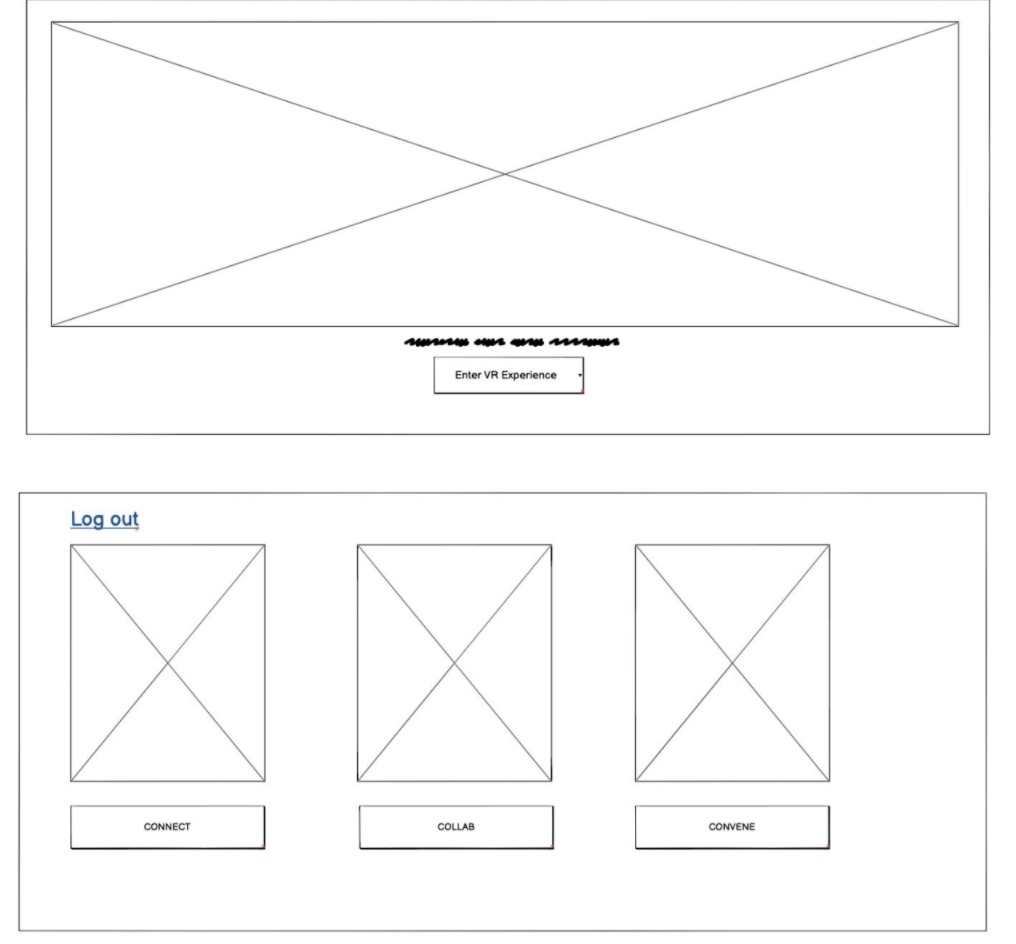
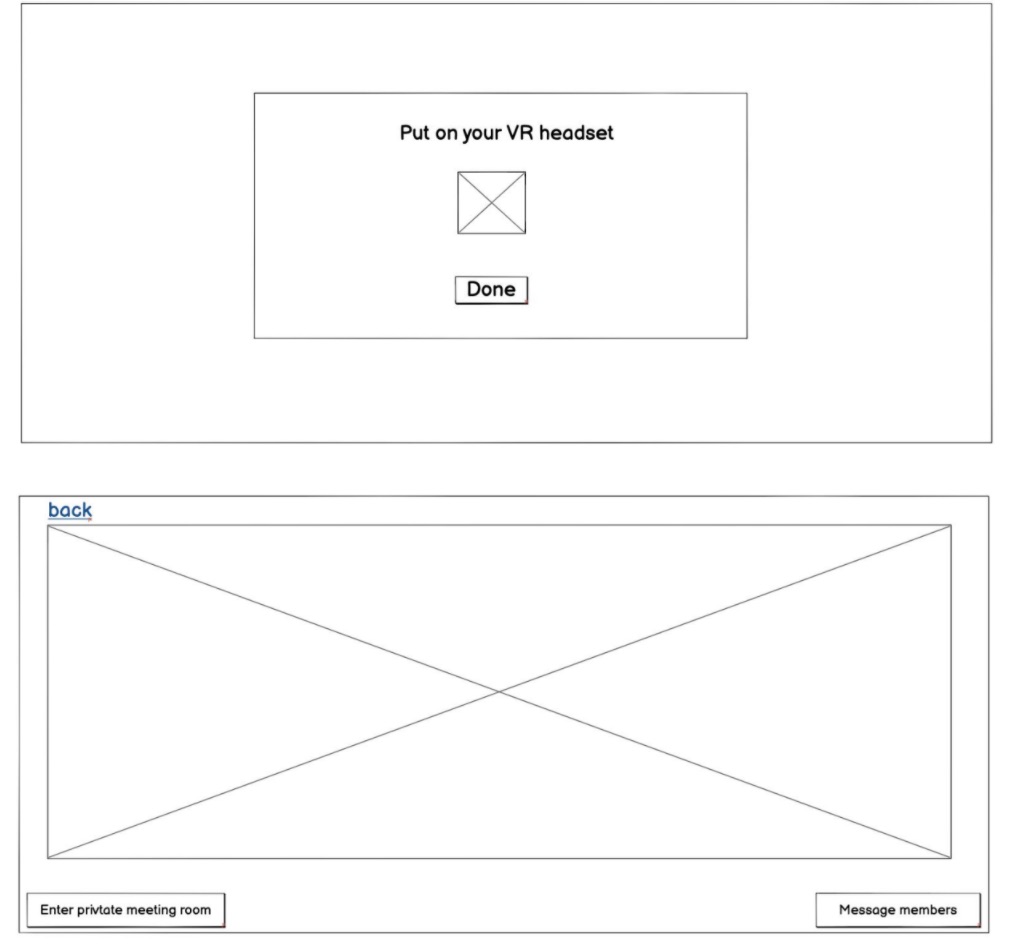
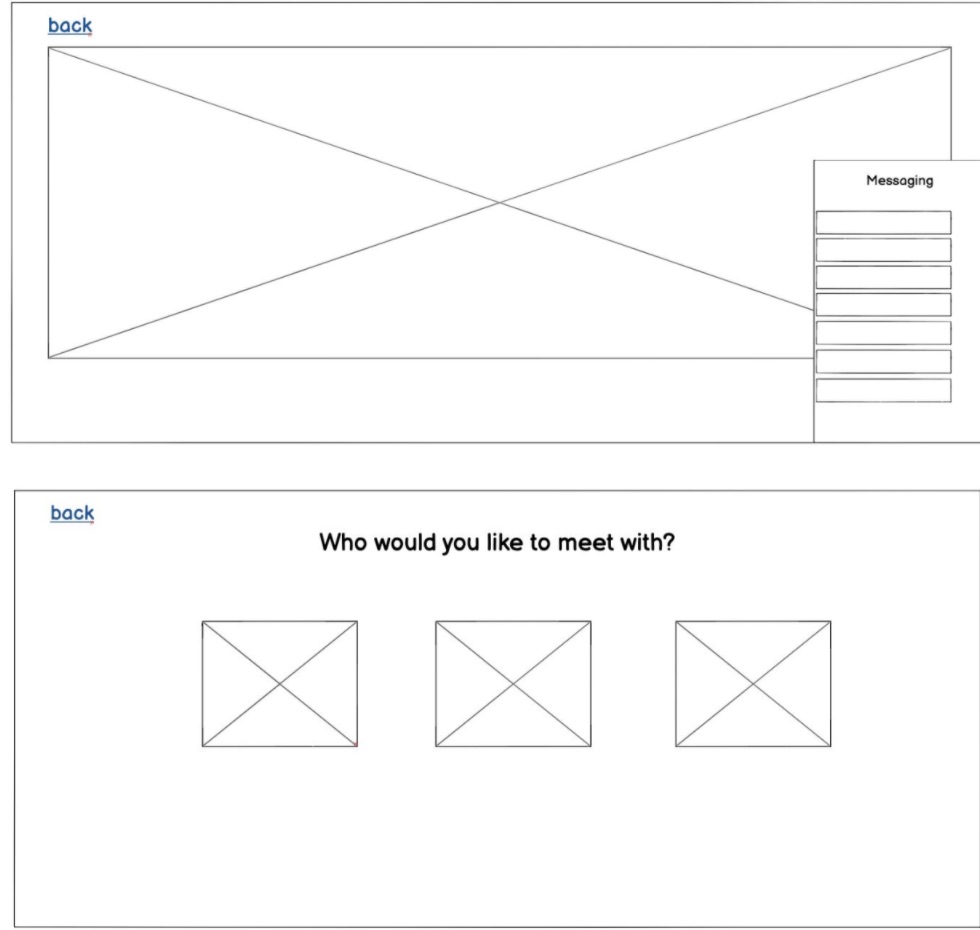
I used the future storyboard sketch of the VR as well as the user research to create a low-fidelity prototype using Balsamiq. I did this so that I could use the prototype to test the assumption that the VR solution would meet the user’s needs and identify usability issues. I called digital
technology “Wricon”.
Step 5:
Evaluation
After creating the conceptual designs, I conducted a small-scale evaluation.
Evaluating conceptual designs early allowed me to adopt an iterative approach to make improvements based on user data before creating detailed designs.
This ensured that the detailed design was most aligned with the problem statement which was more efficient.
Low-fidelity prototype:
I used the future storyboard sketch of the VR as well as the user research to create a low-fidelity prototype using Balsamiq. I did this so that I could use the prototype to test the assumption that the VR solution would meet the user’s needs and identify usability issues. I called digital technology “Wricon”.
Formative evaluation:
First I created a usability plan. I then conducted think-aloud tests with four of the six participants from the user research via Zoom. My goal was to see if users could complete task scenarios so that I could identify key features that I would re-design in my detailed design and identify improvements. I followed this task with a SUS questionnaire, to quantitatively understand the
usability of the prototype.
Step 6:
Detailed Design
My challenge was to design an interactive digital technology that will enhance the connectedness of a local freelance writing community. It was compelling to conclude from user research that community activities and therefore connectedness have declined as a result of COVID.
The results of the user research helped to define the problem statement and informed the design process. I created a VR environment called Wricon, that allows members to connect, collaborate and convene within it. Wricon Connect allows users to virtually meet and network as a group or privately. Wricon Collab allows members to virtually review each other’s work and Wricon Convene helps members to brainstorm and plan community events.
I progressed the VR idea because the evaluation suggests with improvements it would be a viable solution. I created the detailed design in Figma, based on my user research, evaluation and HCI principles. The prototype can be viewed upon request.